Knowledge Base

Cleaning up transaction logs created when RecoveryManager Plus performs any backup and restoration operations

Problem

Once you deploy on-premises Exchange, free disk space will decrease quickly due to the to the increase in logs generated by the mailboxes. This problem of large log sizes is predominant in Exchange versions 2013 and above.

When you install RecoveryManager Plus to back up your on-premises Exchange mailboxes, the product uses the Exchange Web Services (EWS) API to access mailboxes located on the Exchange Server. Every time the product accesses these APIs for any action like taking a backup or performing a restoration, Microsoft Exchange creates a log. If your environment has a large number of mailboxes and you have scheduled daily incremental backups, the available disk space will reduce quickly.

In addition to logs generated by the server when a backup operation is run, there are plenty of logs that are generated on a daily basis by the Exchange server. Unless you regularly clean up old log files, it is very common for mailbox databases to automatically unmount and cause disruptions to your users with the error 452 4.3.1 Insufficient system resources error.

Solution

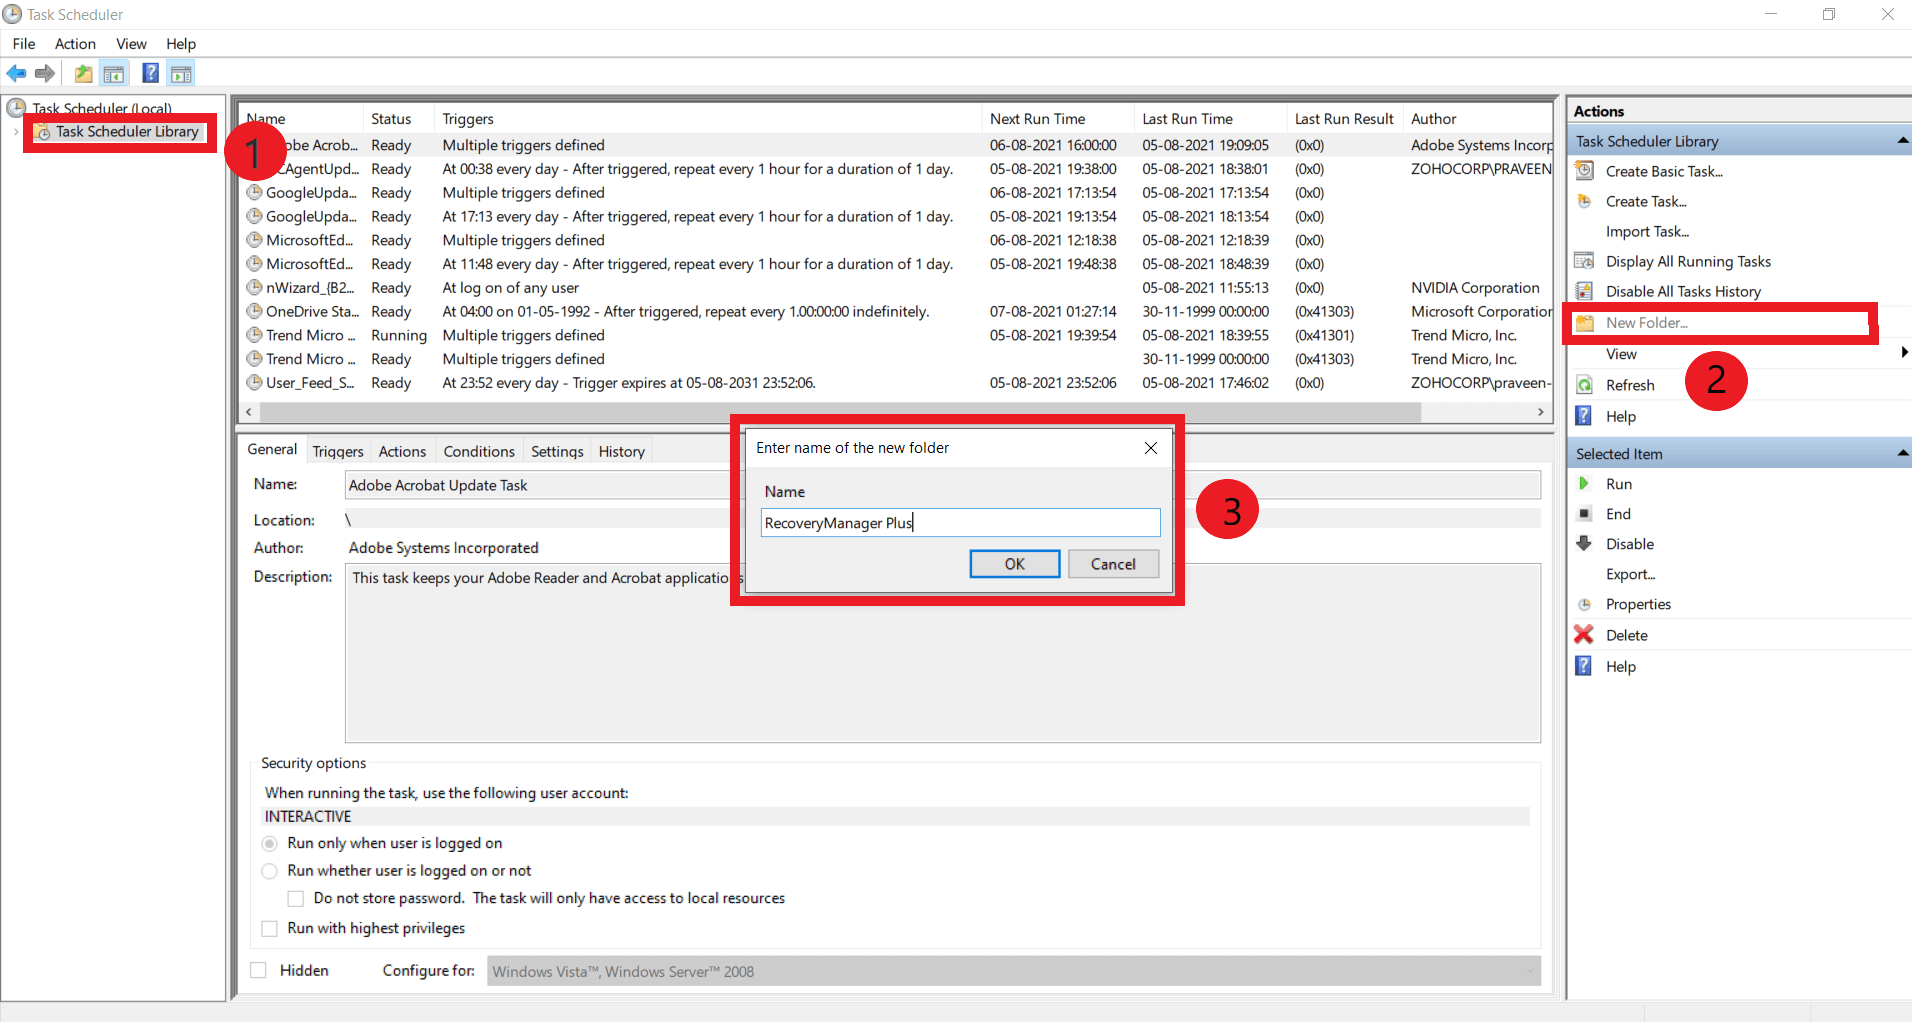
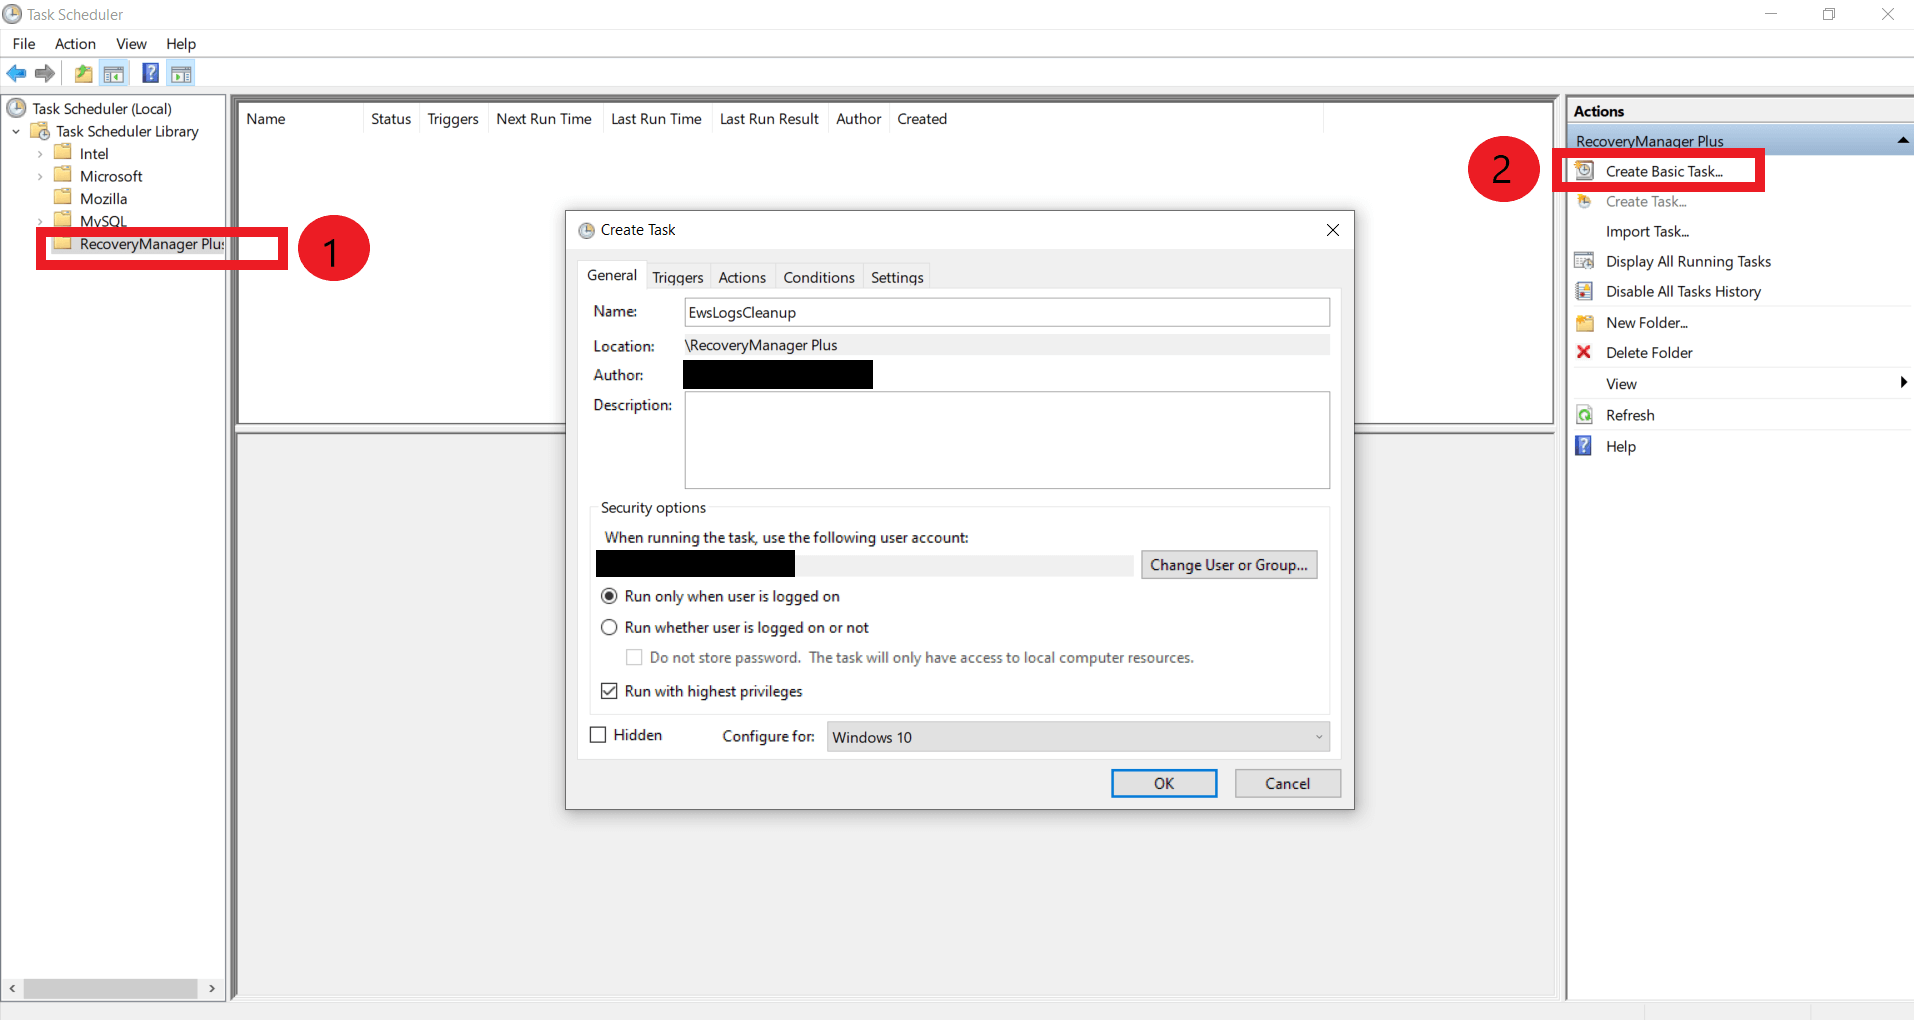
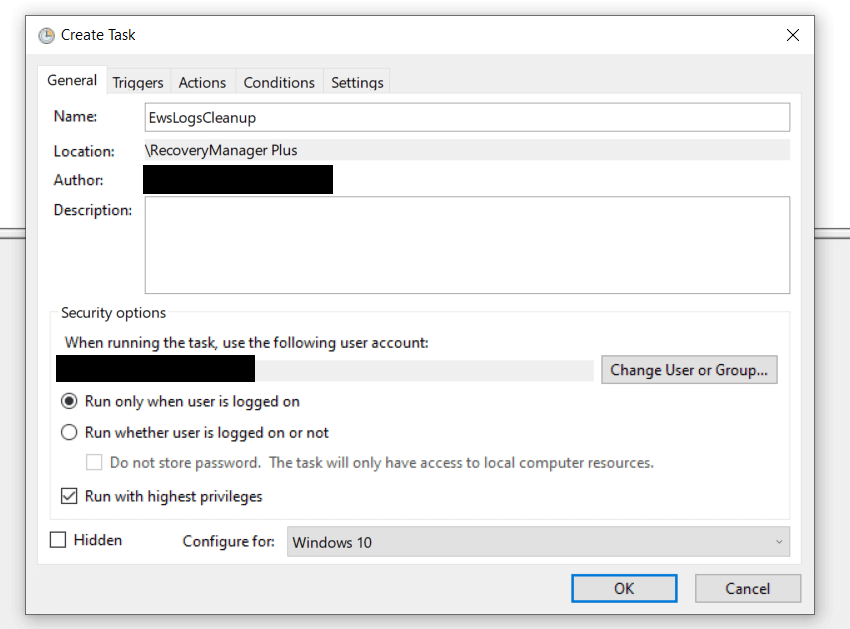
The most efficient way in which this problem can be solved is by periodically clearing old logs created by the Exchange server due to backups and other normal activity. Since these logs are created by the Microsoft Exchange server, these cannot be deleted by RecoveryManager Plus.

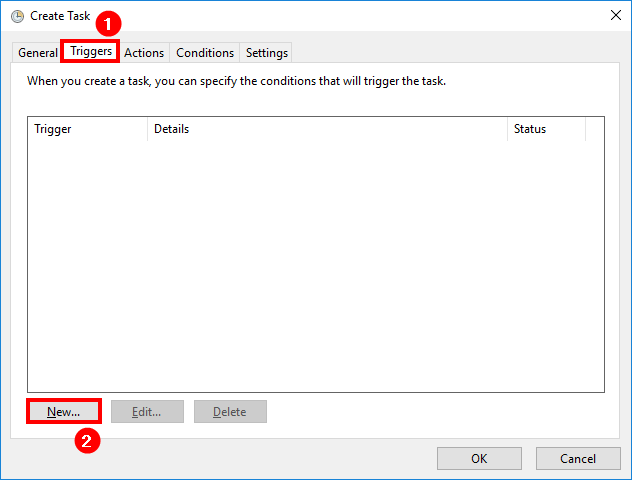
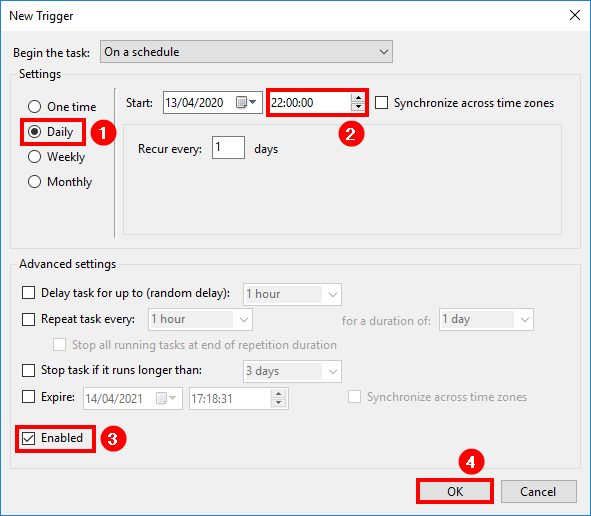
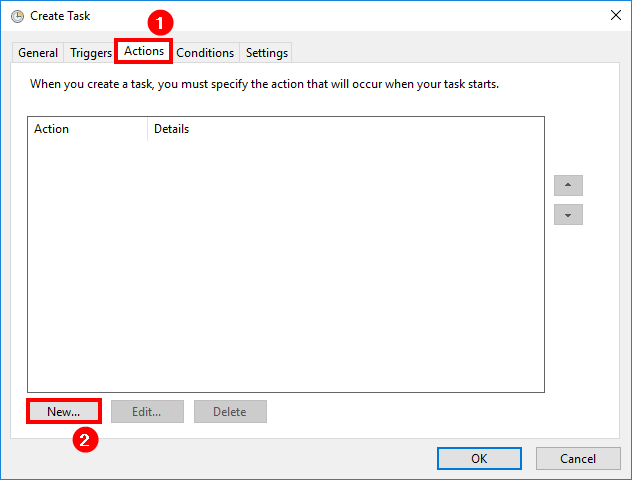
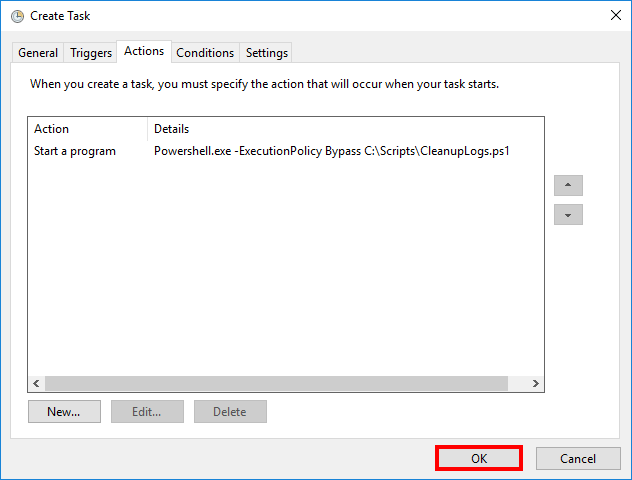
This article will elucidate how you can automate clearing any transaction log files.

Disclaimer: Please be aware that RecoveryManager Plus does not directly create any logs in your Exchange server nor does it delete existing logs. This article explains how you can automatically clear logs that have been and will be created by your Exchange server.

Step 1: Creating the required PowerShell script

  1. Create a PowerShell script.
                    # Set execution policy if not set
                    $ExecutionPolicy = Get-ExecutionPolicy
                    if ($ExecutionPolicy -ne "RemoteSigned") {
                        Set-ExecutionPolicy RemoteSigned -Force
                    }
                    # Cleanup logs older than the set of days in numbers
                    $days = 2
    
                    # Path of the logs that you like to cleanup
                    $LogPaths = "C:\Program Files\Microsoft\Exchange Server\V15\Logging\Ews\"
    
                    # Clean the logs
                    Function CleanLogfiles($TargetFolders) {
                     foreach ($TargetFolder in $TargetFolders) {
                        Write-Host -Debug -ForegroundColor Yellow -BackgroundColor Cyan $TargetFolder
    
                        if (Test-Path $TargetFolder) {
                            $Now = Get-Date
                            $LastWrite = $Now.AddDays(-$days)
                            $Files = Get-ChildItem $TargetFolder -Recurse | Where-Object { $_.Name -like "*.log" } 
    | Where-Object { $_.lastWriteTime -ge "$lastwrite" } | Select-Object FullName foreach ($File in $Files) { $FullFileName = $File.FullName Write-Host "Deleting file $FullFileName" -ForegroundColor "yellow"; Remove-Item $FullFileName -ErrorAction SilentlyContinue | out-null } } Else { Write-Host "The folder $TargetFolder doesn't exist! Check the folder path!"
    -ForegroundColor "red" } } } CleanLogfiles($LogPaths)
    Note 1: In this sample script, we have provided the value 2 in line 7 of the script. Depending on the value provided here, logs older than the number of days of the provided value will be deleted.You can modify the value to any number depending on your incremental backup frequency configured. If you have a daily scheduler, we recommend you provide the value 1. Likewise, use the values 7 and 31 if your incremental backup frequency is weekly and monthly respectively.
    Note 2: If you have installed Exchange in a different directory instead of the default path, provide the path in line 10 of the script. Depending on the version of your Exchange Server, the value ../V15/... has to be changed to the relevant number. If you want to periodically clear other logs in your system, add the location of the logs at the end of $LogPaths separated by a comma.
  2. Store the script as CleanupLogs.ps1 and place it in the C:\Scripts\ folder. If you do not have a Scripts folder, create one in the C:\ drive.

Step 2: Automate the log cleanup procedure using Task Scheduler

  1. Start Task Scheduler

    cleaning-up-transaction-logs-in-exchange-server

  2. Click on Task Scheduler Library from the left-pane and click New folder from the right-pane. Name the folder as RecoveryManager Plus and click OK.

    cleaning-up-transaction-logs-in-exchange-server

  3. Click the newly created Exchange folder from the left-pane and click Create Task from the right-pane.

    cleaning-up-transaction-logs-in-exchange-server

  4. A Create Task window pops-up.
  5. Click on the General tab.
  6. In the Name field, enter EWSLogsCleanup.
  7. Under Security options,
    • Click on the Change User or Group button and select SYSTEM.
    • Enable Run with highest privileges.
    • Select Configure for Windows Server 2016 if you have a Windows Server 2016. If you have a different Windows Server version, select the appropriate one.

      cleaning-up-transaction-logs-in-exchange-server

  8. Click on the Triggers tab and click New.

    cleaning-up-transaction-logs-in-exchange-server

  9. In the Settings section, select Daily and provide the time at which you want the log cleanup to run in the Start field. Make sure that it’s Enabled and click OK.
    Note: In this example, we have selected Daily. However, if you have scheduled RecoveryManager Plus to perform incremental backups weekly or monthly, you can change it accordingly.

    cleaning-up-transaction-logs-in-exchange-server

  10. Click on the Actions tab and click New.

    cleaning-up-transaction-logs-in-exchange-server

  11. In the Settings section,
    • Select PowerShell.exe in the Program/script field.
    • Enter -ExecutionPolicy Bypass C:\Scripts\CleanupLogs.ps1 in the Add arguments (optional): field.
    • Click OK.

      cleaning-up-transaction-logs-in-exchange-server

  12. Click OK.

    cleaning-up-transaction-logs-in-exchange-server

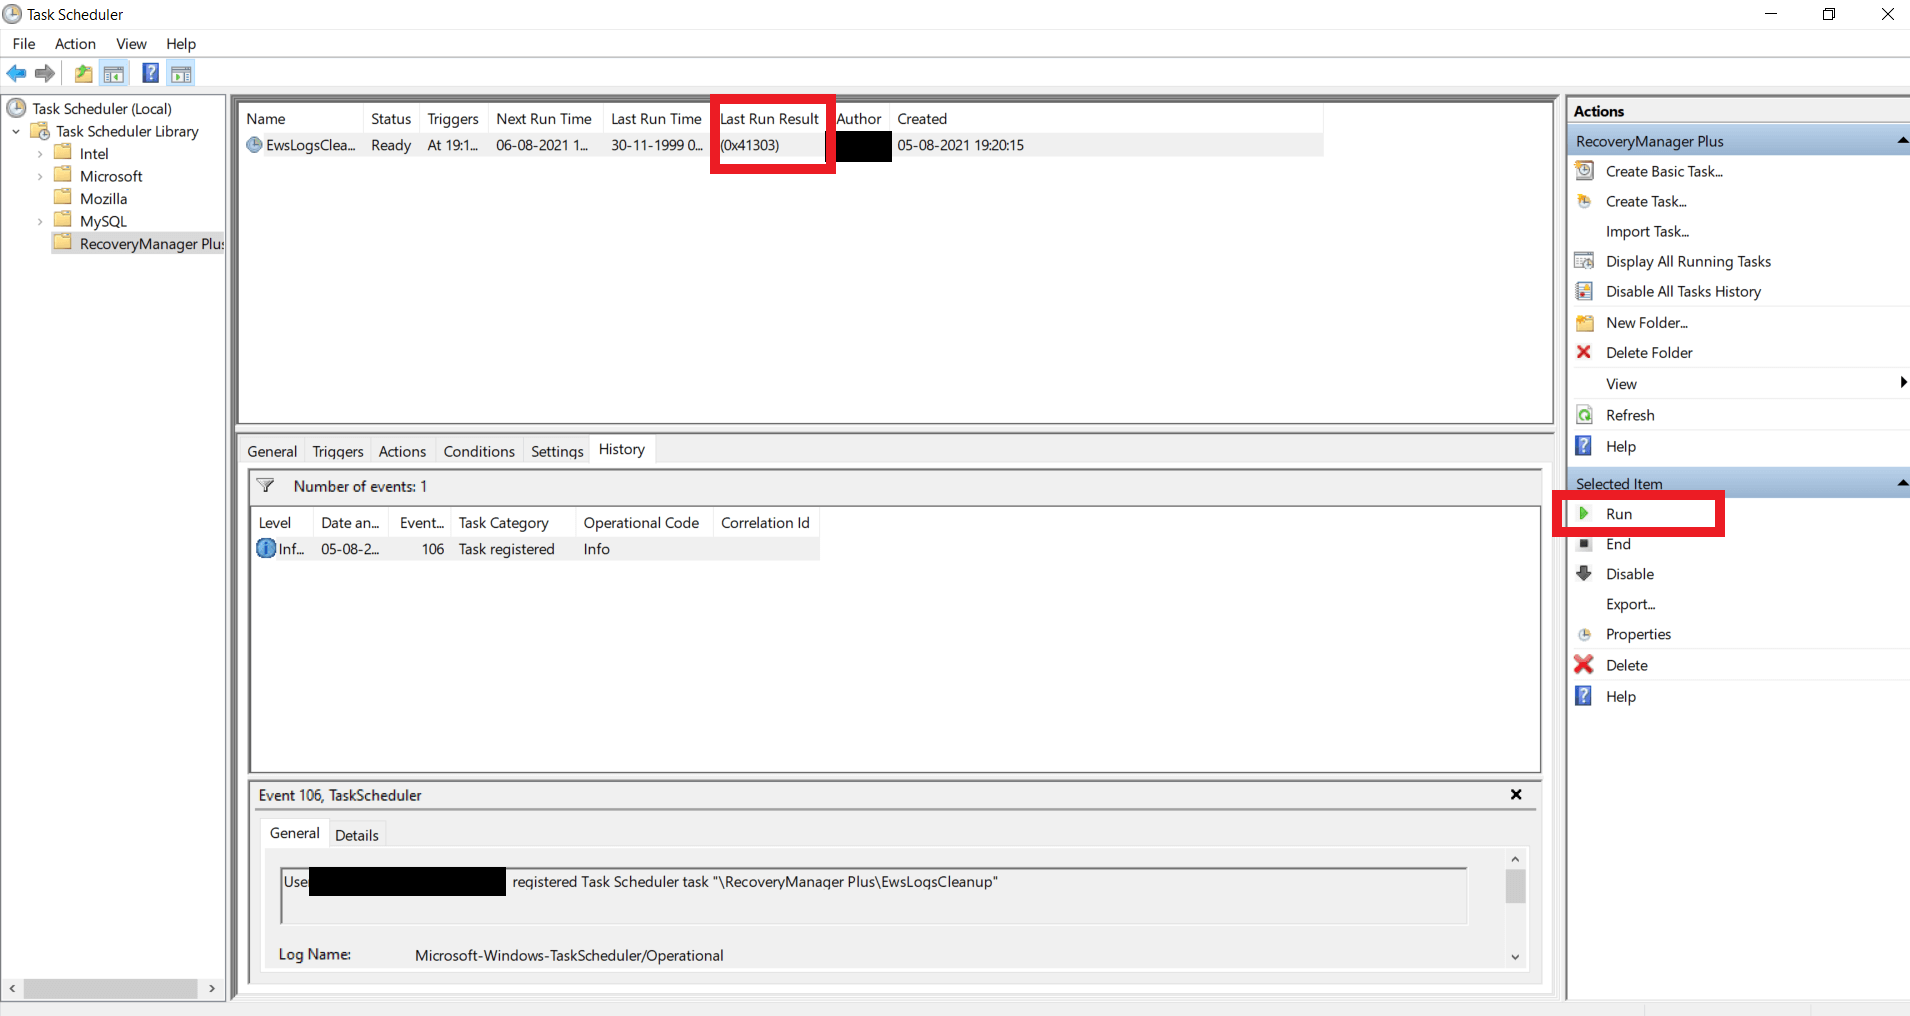
The task has now been scheduled and your Exchange EWS logs will now be cleared at the specified time and frequency.

Step 3: Manually run and test the cleanup Exchange logs task

  1. Click the created task CleanupLogs from the middle-pane and Click Run from the right-pane.
  2. You can check the status of the last run operation in the Last Run Result column in the middle-pane.

    cleaning-up-transaction-logs-in-exchange-server

  3. Check if the CleanupLogs task cleared the logs in the following folder(s).
    C:\Program Files\Microsoft\Exchange Server\V15\Logging\Ews\
    Note: If you have added additional logs to be cleared using the script (line 10 of the script), check if those logs have also been successfully cleared.
Note: Please be aware that RecoveryManager Plus does not directly create any logs in your Exchange server nor does it delete existing logs. This article explains how you can clear logs that have been and will be created by your Exchange server.


Request Support

Need further assistance? Fill this form, and we'll contact you rightaway.

A single pane of glass for Active Directory, Azure Active Directory,
Microsoft 365, Google Workspace, and Exchange Backup.
  • » Personal WorkDrive backup
  • » Backup retention
  • » Incremental backup